For scenarios where you need to have dynamic access control for content in FileNet P8 it is recommended to use a security proxy instead of the default instance security on document or folder classes. In the following article I want to describe how to setup the security proxy in ACCE and how you use it to set the access control on documents.
- You need to create class that is representing the security proxy documents. I use the is class as child of the custom object class because you can see this only in ACCE which hides it for normal users.
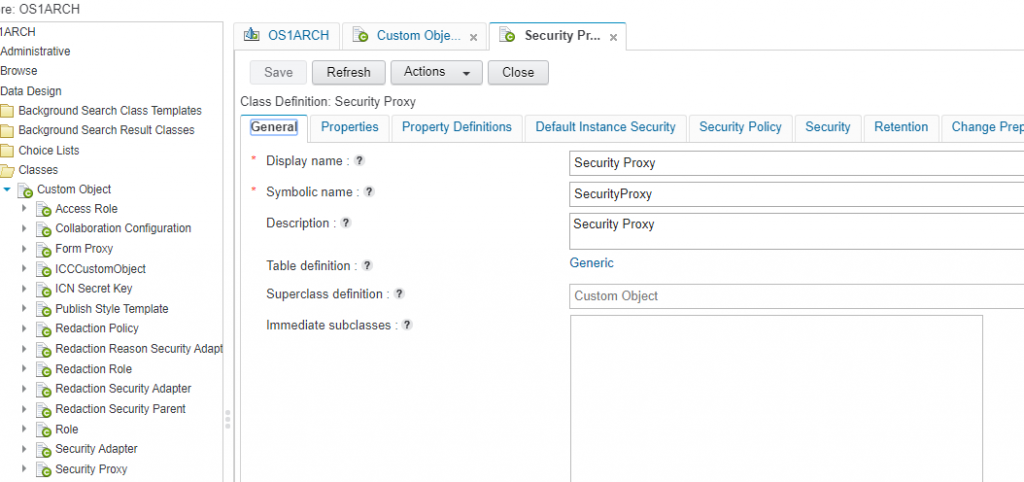
The class itself does not need to have special configuration. Just create a subclass ob custom object. If you want you can add a property template like security proxy name to better identify the proxy document later but this is not necessary.
2. You need to create a property template that is representing the security proxy element from the security proxy custom class. In my case I called it „Security Object“. The data type must be object and you need to access the „Set other attributes“ option while creating the property template. Here you can set the „Security Proxy Type – Inherited“


3. Now you can add the property tempalte to the class in where you want to use the dynamic security. In my case I just added it to the „Document“ document class. When you added it open the property settings before saving it. On the tab „More“ you need to set the „Required class“ which is our previously created custom object class „Security Proxy“

Save the settings. Now you can create a Security Proxy Object in the custom object class. For a better handling I create a folder called „Security Proxies“ under the root folder.

You can store all the security objects in this folder. If you want to customize the security later it is easier to recover the objects instead of searching them. In the folder create a new custom object


I created a security object called „Class_Document_Proxy“. If you want the security object as a default for the document class you need to set it as the default value for the „Security Object“ property tempalte in the document class. So copy the GUID of the create proxy object and paste it in the property templates default value.

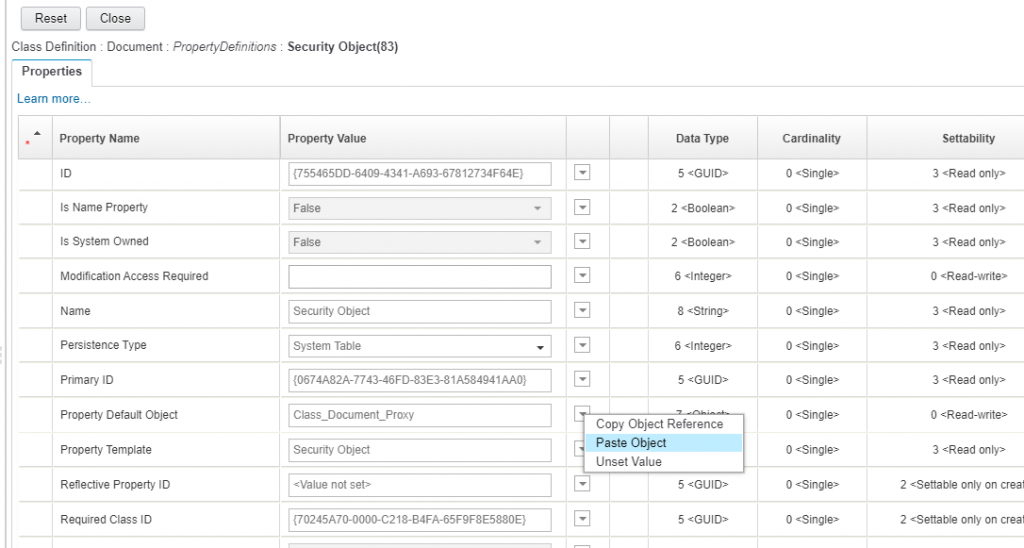
In the document class open the „properties“ tab and unfold the „Property Definitions“ list.

Paste the GUID to the „Property Default Object“. Now each document created in this class uses the security proxy object as default.
In the security proxy object you should now set the required access control in the security tab of the object.
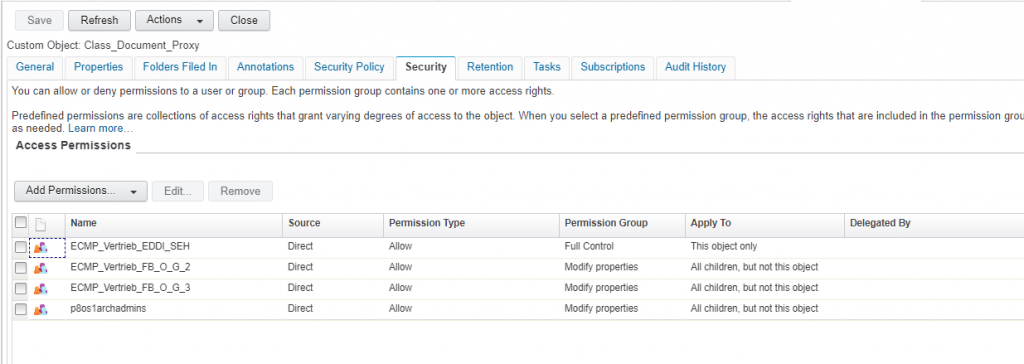
It is important that you set „apply to“ to all children of this object. For security reason I do not set the access for the groups to this securitya object. In connection you should also modify the default instance security of the document class. If you still have static users/groups that should have acces to the content like admins you can let them a default security objects in the class. All other remove and entitle them only via security proxy.
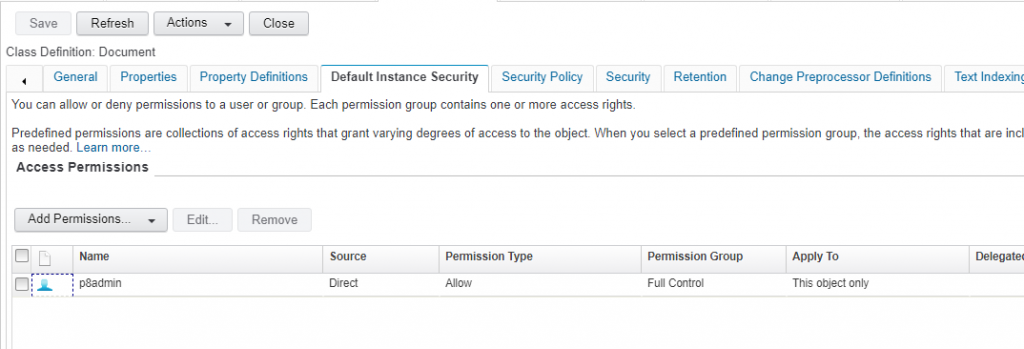
If you can see in my case only the p8admin is part of the default instance security of the document class. Lets create a document and see whats happening.
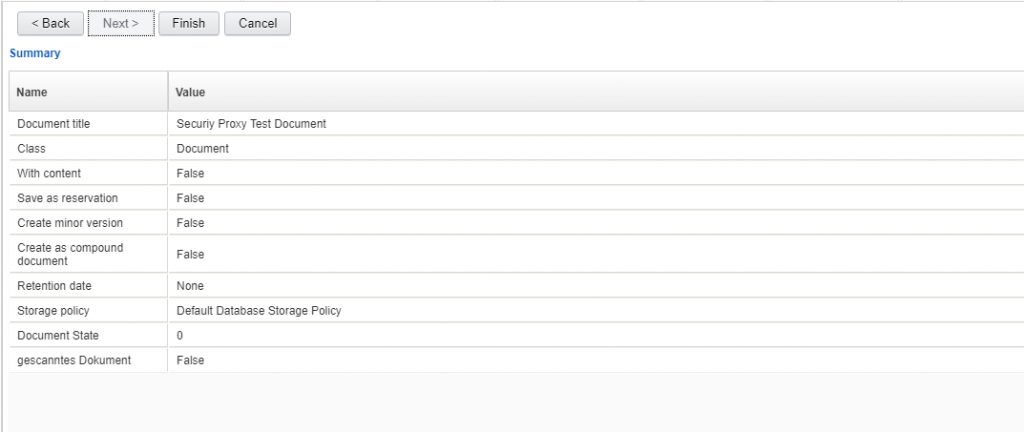

The groups we set up before in the security proxy object are inherited to the document we created. If we now remove of deny i.e. the EMCP_Vertrieb_FB_O_G_2 group it is immediately passed to the document.
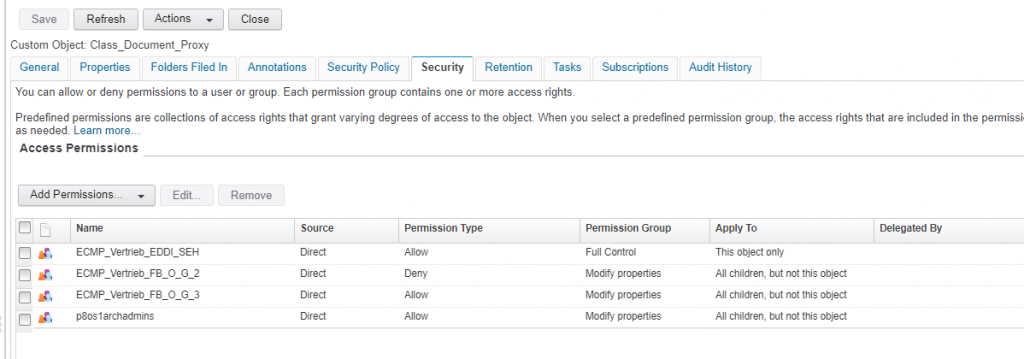
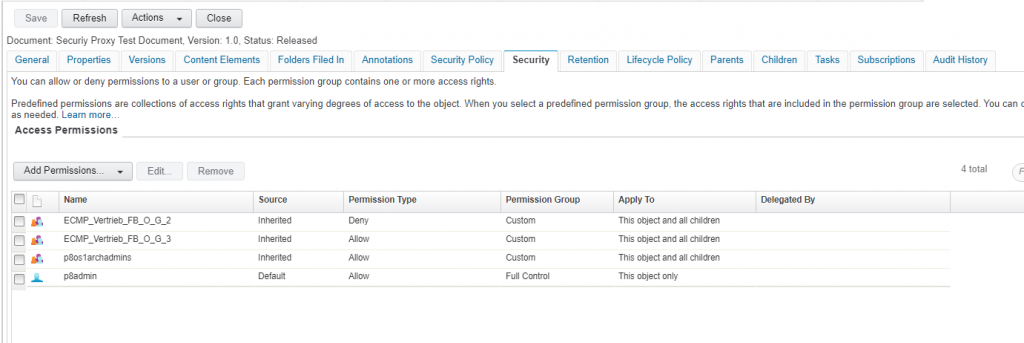
You see the security proxy is a very flexible concept for changing authorization requirements in business solution.

