
If you are planning to use the .NET API in connection with Kerberos Single Sign-on there are some requirements and steps to enable this for your Content Engine. The following post will guide you step by step so that you have at the end a full working Kerberos authentication.
This implementation is a little bit different as you might know it from other Kerberos SPNEGO environment e.g. when you are using IBM Content Navigator SPNEGO authentication
Create a Active Directory user account for the Kerberos Authentication.
I created a user calles FNCEWS_strc071fntt1. Make sure that the „Only Kerberos DES encryption for this account“ setting is unchecked.
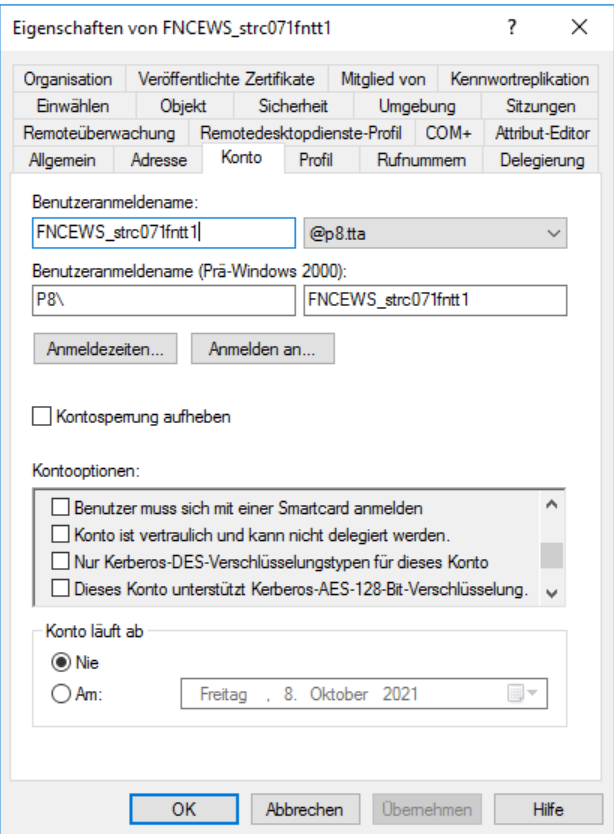
At the end you can choose every name you want. But there are two requirements that the account name must meet.
- it must start with FNCEWS_
- the total length of the name must not exceed 20 characters
Create the SPN an map it to the previously created user.
Open a command prompt on your Active Directory server and enter „setspn -a FNCEWS/STRC071FNTT1 FNCEWS_strc071fntt1„

The SPN must also start with FNCEWS/
Create the keytab file
The keytab file you must create can be done in different ways. But my personal experience is that it is only working with RC4-HMAC encryption. So on the Active Directory server open a command prompt and enter the following command: „ktpass -princ FNCEWS_strc071fntt1@P8.TTA -pass LaSagne123 -crypto RC4-HMAC-NT -ptype KRB5_NT_PRINCIPAL -kvno 0 -out C:\CPE.keytab„
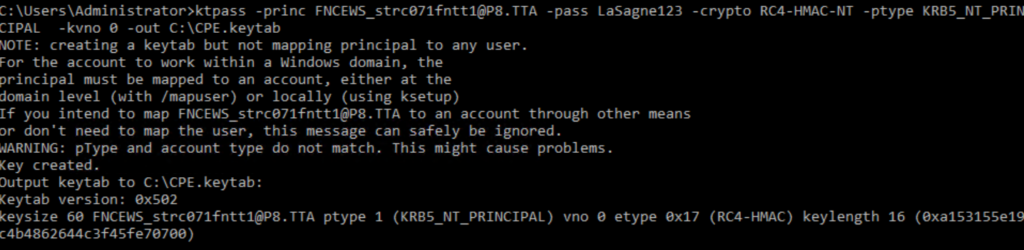
Pay attention on the principal name „-princ“. This must be the name of the AD user account and not the SPN!
Create the Kerberos configuration file
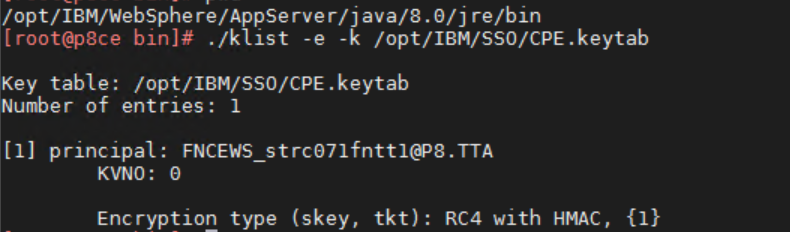
Copy the previously created keytab file to the server/s running Content Platform Engine where you want to use Kerberos SSO. Create the Kerberos configuration file e.g. KRB5.ini with the following content. Check the content of the keytab file with the „klist“ command in the JAVA_HOME/jre/bin directory.
In my case it is the JAVA directory of my WebSphere Application Server under /opt/IBM/WebSphere/AppServer/java/8.0/jre/bin
Run ./klist -e -k /opt/IBM/SSO/CPE.keytab and make sure there is only one valid KNVO entry that have the RC4-HMAC encryption.
Create the KRB5.ini with the following content.
| [libdefaults] default_realm = P8.TTA default_keytab_name = FILE:/opt/IBM/SSO/CPE.keytab default_tkt_enctypes = rc4-hmac default_tgs_enctypes = rc4-hmac forwardable = true renewable = true noaddresses = true clockskew = 300 [realms] P8.TTA = { kdc = p8ad.p8.tta:88 default_domain = p8.tta } [domain_realm] .p8.tta = P8.TTA |
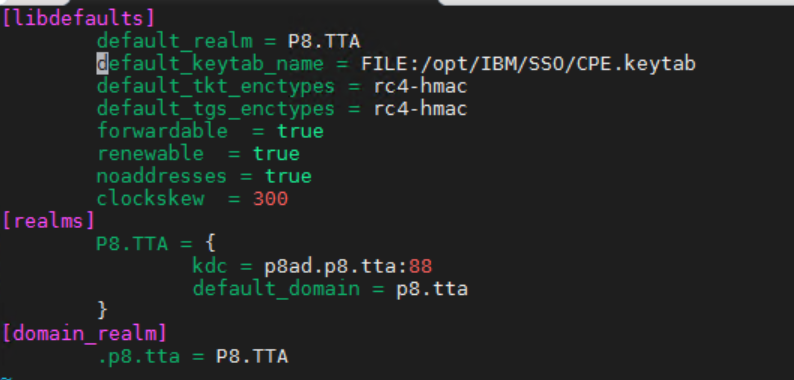
Here it is important that you choose the correct encryption like RC4-HMAC.
Enabling Kerberos on the Application Server
Copy the Engine-authn.jar from installdir/FileNet/ContentEngine/Kerberos to the lib directory of your WebSphere server

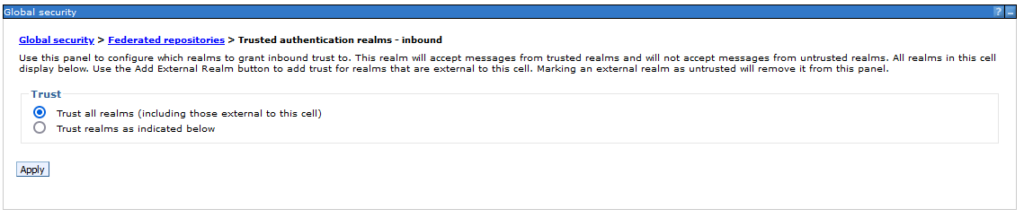
Logon to the WebSphere Application Server admin console and got to Security > Global Security > Federated repositories > Trusted authentication realms – inbound page and select Trust all realms (including those external to this cell)
In the Security > Global Security page, click Java Authentication and Authorization Service, to show the items underneath, then click Application Logins. Verify that the FileNetP8KerberosService is available and the modules:
- com.filenet.engine.authentication.kerberos.login.KrbServiceLoginModule
- com.ibm.ws.security.server.lm.ltpaLoginModule
- com.ibm.ws.security.server.lm.wsMapDefaultInboundLoginModule
If not create them.

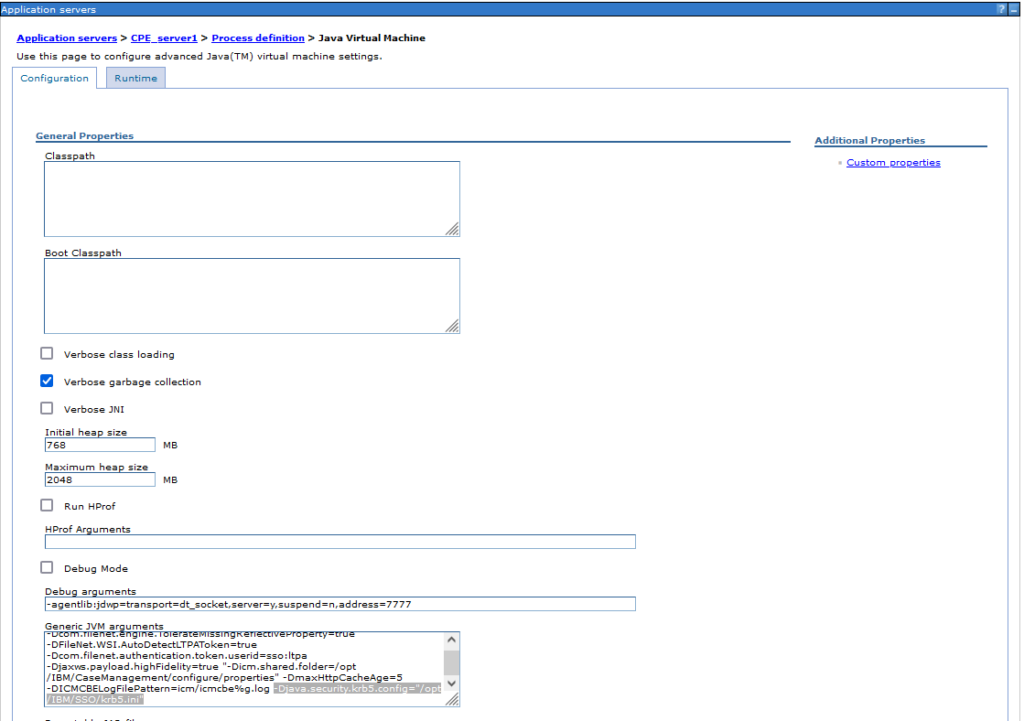
The next step is to set the path to the KRB5.ini file as a Djava parameter in the JVM. So go to WebSphere Application Servers > <WASSERVER> > Java and Process Management > Process definition > Java Virtual Machine and set the -Djava.security.krb5.config=“/opt/IBM/SSO/krb5.ini“ under Generic JVM arguments.
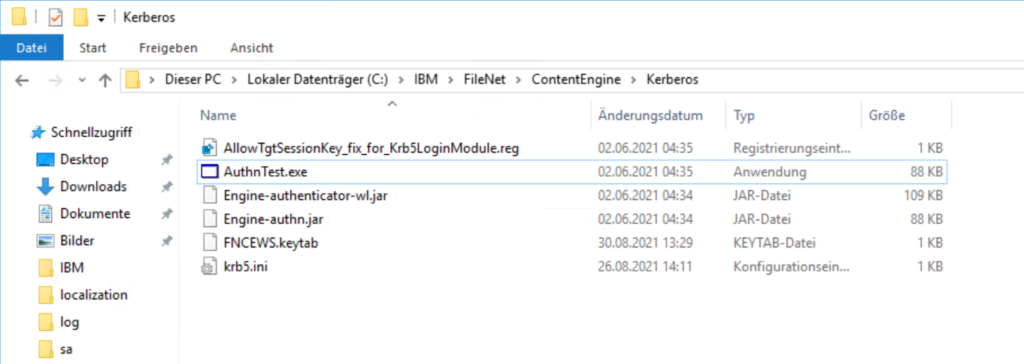
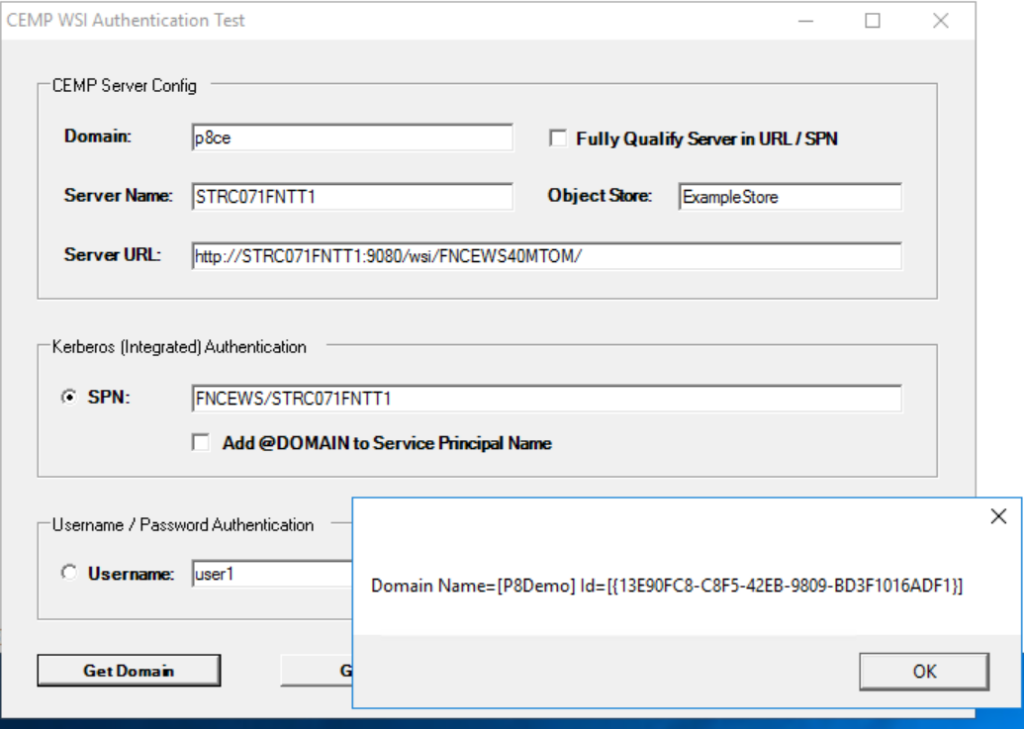
Now restart your WebSphere Application Server and use the AuthnTest.exe that is deliverd with the Content Engine installer for Windows to test your Kerberos authentication.
I hope with this guide you were able to enable the Kerberos SSO authentication for your FileNet Content Engine.