
As IBM announced with FileNet 5.7 that Content Search Services will be deprecated in the future, it is now time to look at the new search options with Elasticsearch and OpenSearch. In this guide, I will cover how to deploy Elasticsearch on OpenShift and connect the cluster to your FileNet P8 domain.
Log in to your OpenShift console and optionally create a new namespace for Elasticsearch, or deploy it into an existing one. In this guide, we will create a new namespace called elastic.
oc new-project elastic-systemDeploy the operator. Be aware that by default, the namespace is set to elastic-system. If you want to install the operator into another namespace like elastic, you need to download the YAML files and edit them before deploying.
oc create -f https://download.elastic.co/downloads/eck/3.0.0/crds.yaml
oc apply -f https://download.elastic.co/downloads/eck/3.0.0/operator.yaml
You can monitor the deployment with the following command. If the Software Defined Network is configured with the ovs-multitenant plug-in, you must allow the elastic-system namespace to access other Pods and Services in the cluster:
oc adm pod-network make-projects-global elastic-systemCreate a namespace to hold the Elastic resources (Elasticsearch, Kibana, APM Server, Beats, Elastic Agent, Elastic Maps Server, and Logstash)
oc new-project elasticAllow another user or a group of users to manage the Elastic resources
oc adm policy add-role-to-user elastic-operator developer -n elasticDeploy an Elasticsearch instance with a route. Use the following code to create an Elasticsearch cluster called elasticsearch and a „passthrough“ route to access it:
cat <<EOF | oc apply -n elastic -f -
# This sample sets up an Elasticsearch cluster with an OpenShift route
apiVersion: elasticsearch.k8s.elastic.co/v1
kind: Elasticsearch
metadata:
  name: elasticsearch
spec:
  version: 8.16.1
  nodeSets:
  - name: default
    count: 1
    config:
      node.store.allow_mmap: false
---
apiVersion: route.openshift.io/v1
kind: Route
metadata:
  name: elasticsearch
spec:
  #host: elasticsearch.example.com
  tls:
    termination: passthrough
    insecureEdgeTerminationPolicy: Redirect
  to:
    kind: Service
    name: elasticsearch-es-http
EOF
Deploy a Kibana instance with a route. Use the following code to create a Kibana instance and a „passthrough“ route to access it
cat <<EOF | oc apply -n elastic -f -
apiVersion: kibana.k8s.elastic.co/v1
kind: Kibana
metadata:
  name: kibana
spec:
  version: 8.16.1
  count: 1
  elasticsearchRef:
    name: "elasticsearch"
  podTemplate:
    spec:
      containers:
      - name: kibana
        resources:
          limits:
            memory: 1Gi
            cpu: 1
---
apiVersion: route.openshift.io/v1
kind: Route
metadata:
  name: kibana-sample
spec:
  #host: kibana.example.com
  tls:
    termination: passthrough
    insecureEdgeTerminationPolicy: Redirect
  to:
    kind: Service
    name: kibana-kb-http
EOF
Use the following command to get the hosts of each Route
oc get route -n elastic
Now you can access Elasticsearch and Kibana using the provided route URLs.
The default user to log in to Kibana is elastic. You can extract the password from the created secret elasticsearch-sample-es-elastic-user with the following command:
oc get secret elasticsearch-sample-es-elastic-user -n elastic -o go-template='{{.data.elastic | base64decode}}'
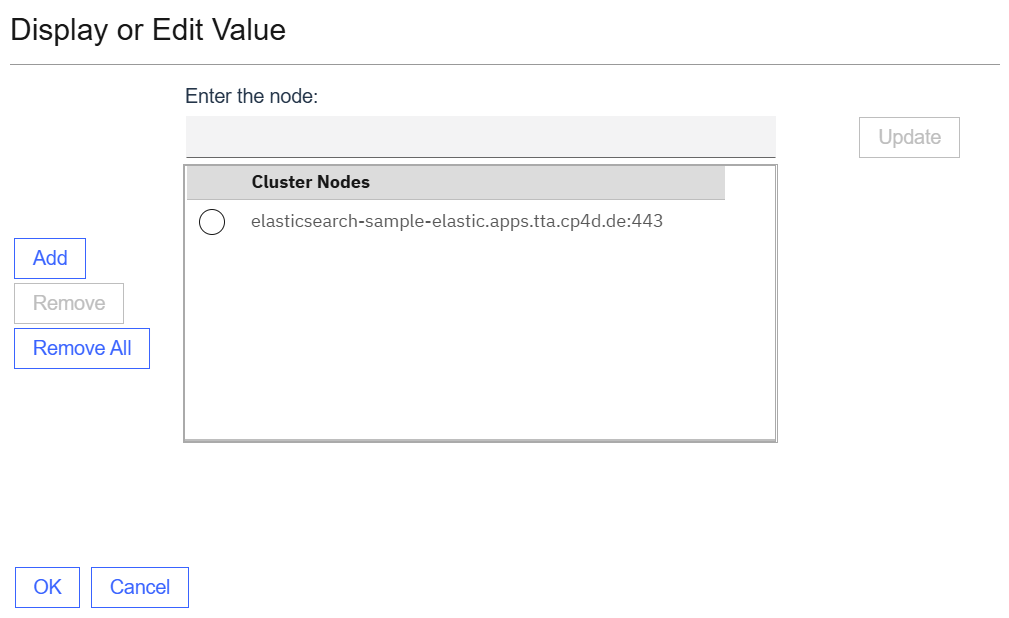
Now it’s time to add the created Elasticsearch instance to your FileNet P8 domain. Log in to ACCE and navigate to Domain Settings > Administration > Elasticsearch Cluster, then create a new entry.

In the Cluster Nodes section, you can add one or more cluster hostnames or the load balancer address. Please keep in mind that you also need to provide the port of the instance.
Now open the objectstore where you want to use the Elasticsearch feature and first create a new index area in the section „Elasticsearch“ under „Index Areas„.
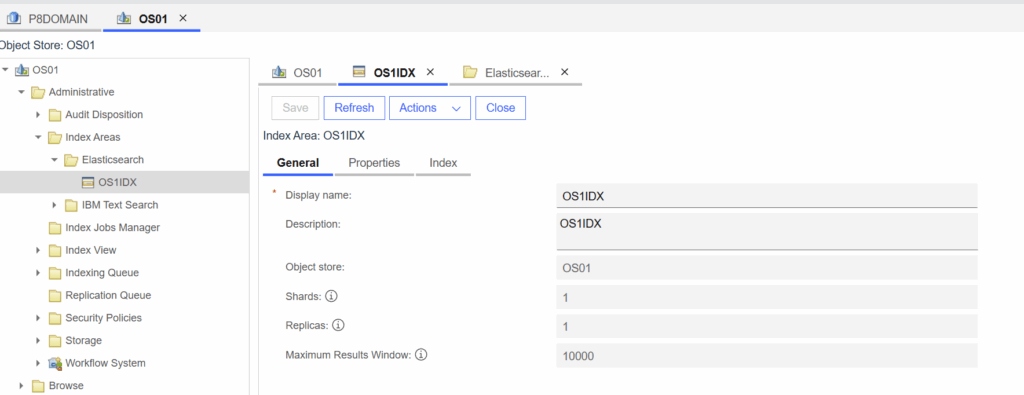
Currently it is only possible to create one index area. When the index area is created you can check the index in your Kibana dashboard as well.

Now open the obejectstore generall settings and select the languages you want to use with the Elasticsearch index.
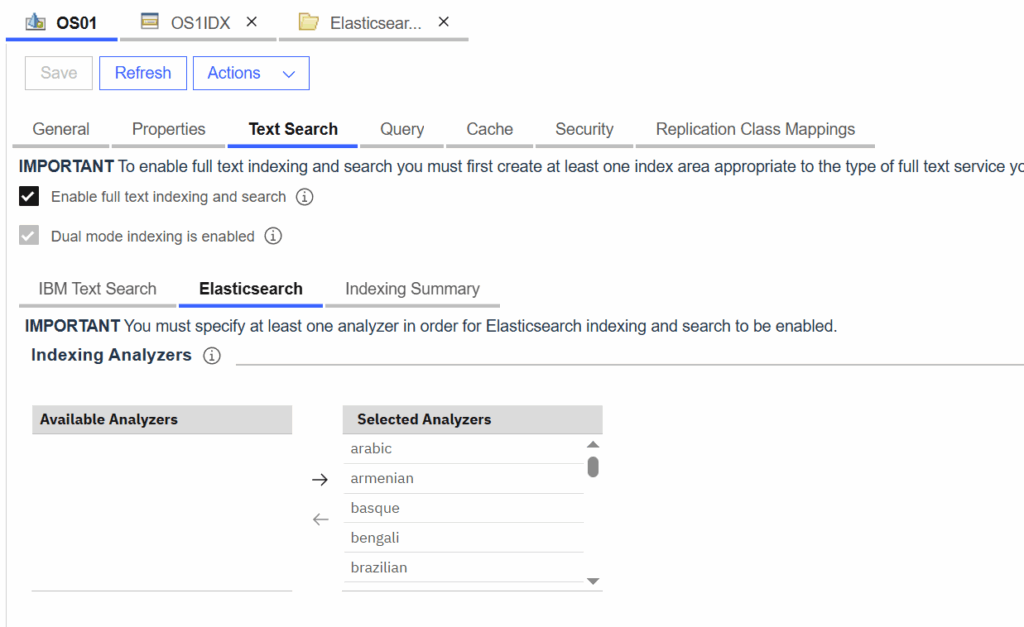
After saving, the Dual mode indexing is enabled feature will also be activated. This is particularly useful when migrating existing CSS indexes to Elasticsearch, as it allows you to build the Elastic index without having to drop the existing CSS index first.
When you add documents to a class with CBR enabled, you will see the index requests appear in the Elasticsearch Indexing Queue Sweep under Queue Sweeps in Sweep Management.
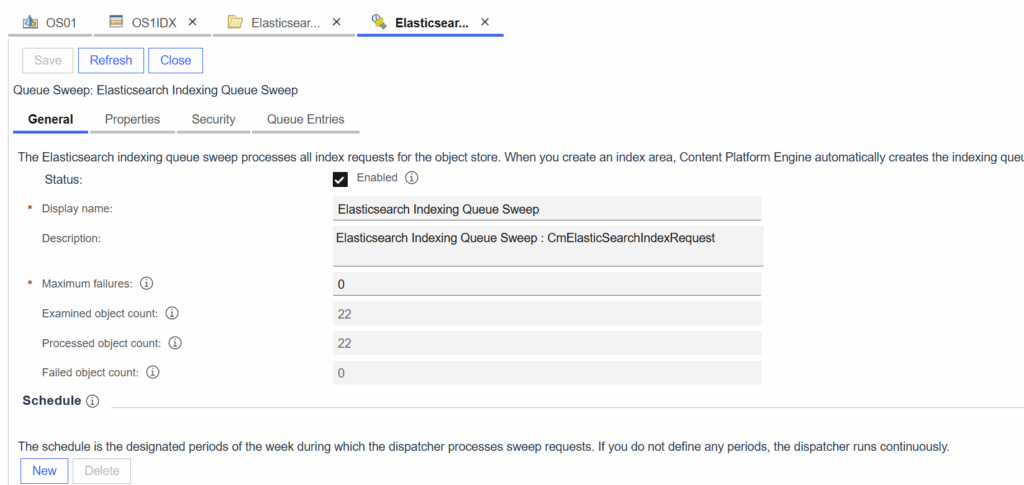
When the requests are processed you will see the new documents also in Kibana when you view the index.

You can see the text content and the GUID as well.